Carpenter's Pencil
Carpentry Pencil vs Regular Pencil
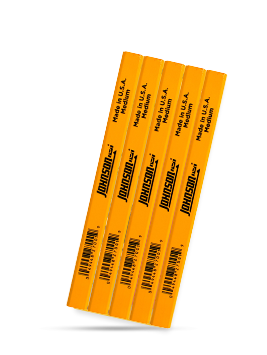
A carpenter’s pencil (also called a ‘carpentry pencil’ and ‘carpenter pencil’) is a pencil made for carpentry work. There are some important differences between regular pencils and carpentry pencils.
The shape of a typical pencil is generally round or hexagonal, whereas a carpenter’s pencil is either elliptical or rectangular. A carpenter’s pencil is shaped as such to prevent the pencil from rolling away. Additionally, carpentry pencils are easier to grip due to the larger surface area.
Carpenter’s Pencil Uses
Carpentry pencils also allow for both thin and bold lines by rotating the pencil while in use. The former are for quick, precise lines on smooth surfaces, while the latter are used for rougher surfaces. Notching the middle of the pencil lead will allow two parallel lines to be drawn simultaneously.
Carpenter pencils are also made for durability, as they are used on job sites. The lead is usually stronger and denser than regular pencils, as is the carpenter pencil’s core. The stronger pencil lead provides use by builders and in the construction industry, as markings can be made on stone or concrete.
How to Sharpen A Carpenter Pencil
Carpentry pencils are mostly sharpened by hand because they don’t fit in a round-shaped pencil sharpener. Below is a handy guide on the process of sharpening a carpentry pencil.
- Grasp the carpentry pencil firmly, making sure your hand has a few inches of space between it and the end you’ll be sharpening. Your sharpening tool can either be a utility knife or a chisel.
- With your other hand, take your sharpening tool and point it towards the pencil at a 45° angle, about a half-inch from the end you wish to sharpen. Important: always keep the sharpening tool pointed away from you.
- Begin slicing off the pencil’s wood, starting with the narrow sides and then moving on to the wider sides. Place the sharpening tool against the pencil. Push the blade of your tool into the pencil and away from your body in a whittling style. Continue cutting off shallow slices until the pencil lead is exposed. Be careful not to cut into the lead proper. Stop sharpening when about a quarter inch of lead is showing.
- The sharpness of the lead can be adjusted using sand paper. Place the pencil’s flat side, tip end on a piece of sandpaper. Lean the pencil’s body upwards and drag the tip against the paper. Turn over the carpentry pencil and repeat until the desired sharpness (or thickness) is reached.
For more handy instruction on proper tool use, visit the collection of how to use tool guides from Johnson Level.
