Choosing Optical Instruments
Shop all optical levels from Johnson Level.
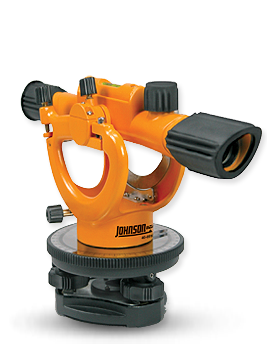
This article will help you choose an optical instrument, commonly referred to as a transit level, builder's levels and automatic levels. Transits are used to establish grades & elevations as well as establish straight lines.
Models Recommended
40-6926 26X Automatic Level (#1 features: maximum accuracy and a compensator for movement)

40-6900 22X Builder's Level (#1 feature: easy setup)


40-6910 22X Builder's Transit Level (#1 feature: provides vertical and horizontal readings)


Common End User Applications


1. Construction Contractors
- Site preparation
- Establishing grades
- Excavating
- Landscaping - terracing & retaining walls
- Rough & Fine grading
- Digging basements
- Setting foundation & footers
- Retention ponds & septic tanks
2. Concrete Contractors
- Controlling concrete pours
- Alignment & plumb of concrete forms
3. Deck Builders
- Leveling deck floors
- Establish diagonals & footings for decks/patios
4. Farmers
- Contour farming
- Drainage
Accessories
| Accessories | Model# |
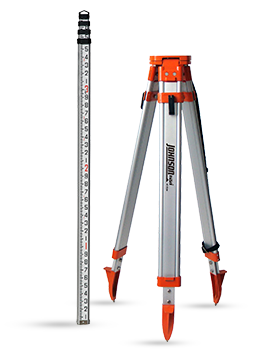
| Heavy-Duty Aluminum Tripod | 40-6340 |
 How to Use an Automatic Optical Level
- Make sure that the tripod is stable and securely planted before setting up the builder’s level.
- Tighten the attachment between the builder's level and tripod.
- Ensure the four leveling screws are not too tight against the leveling base plate.
- First position: line up the telescope until it is located directly over a pair of leveling screws.
- Using the leveling screws, center the bubble in the spirit vial.
- Placing both of the leveling screws between your thumb and forefinger, turn both screws at the same time in opposite directions and watch for movement in the graduated spirit vial.
- Move the thumbs together in or out. The bubble will follow the left thumb.
- Second position: when the bubble is centered, rotate the telescope 90°.
- Repeat the thumbs in, thumbs out action until the bubble is centered in the second position.
- Turn the telescope back to the first position and make the proper adjustments to ensure that the instrument is still level.
- Move the instrument through various stages of the 360° and check if the instrument is level at all points.
- Focus your builder’s level by aiming your telescope at an object. It should look blurry at first, but turning the eyepiece either left or right should make the object appear clearer.
- After focusing the eyepiece, point the level directly at the specific target.
- Keeping the crosshairs in focus, use the focusing knob to make the specified object appear sharp.
- You are ready to make accurate measurements.
Shop all optical levels from Johnson Level.
Check out our level how-to guides for helpful information on operating specialty levels.
©2010 Johnson Level & Tool Mfg. Co., Inc.
